
How to Send a Daily Email Automatically in Gmail (2025 Guide)
In this article we explain how to set up automatic emails daily through Gmail with Lido. Simply follow the steps below!
Setting Up Automated Daily Emails through Gmail with Lido
Below we outline the steps on how to send a daily email automatically in Gmail:
1. Add Data to Lido
Before you can send reminders, you need to add your data into Lido. If you do not have a Lido account yet, sign up for free at: https://www.lido.app/go/signup
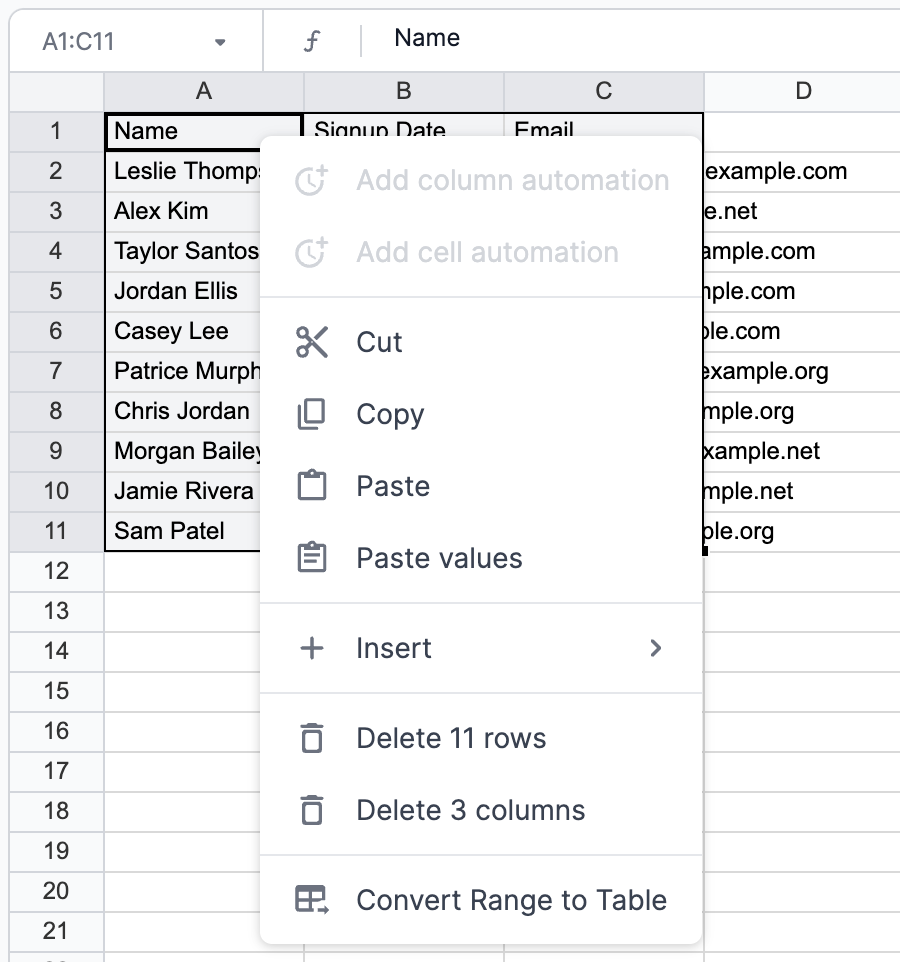
Lido is a smart spreadsheet that helps automate tasks by linking data directly to emails. To begin, enter the details such as names, signup dates, and the specific messages you want to send. If this data is already organized in a Google Sheet, move to step 2. Otherwise, create a table with each row representing a unique reminder for a client. This table should have a column containing the email addresses for each client.

Once your data is formatted, right-click the selection and choose "Convert Table from Range". Save your named table and proceed to the next step.
2. (Optional) Connect Google Sheet to Lido
Skip this step if you added a table already in step 1. Otherwise, if you already have the data that you want to use to send automated email reminders to in a Google Sheet, then you can connect the Google Sheet directly to Lido.
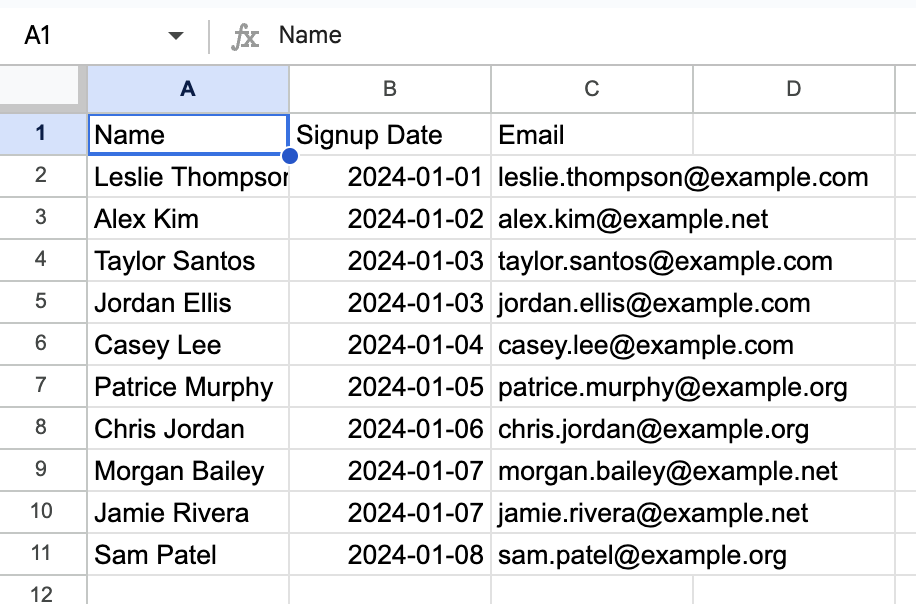
Make sure your Google Sheet is formatted like our sample sheet here. The data should be in a contiguous table, with no empty rows or columns. Column headers (Name, Email Address, etc.) should be in the first row and contain no special characters or line breaks.
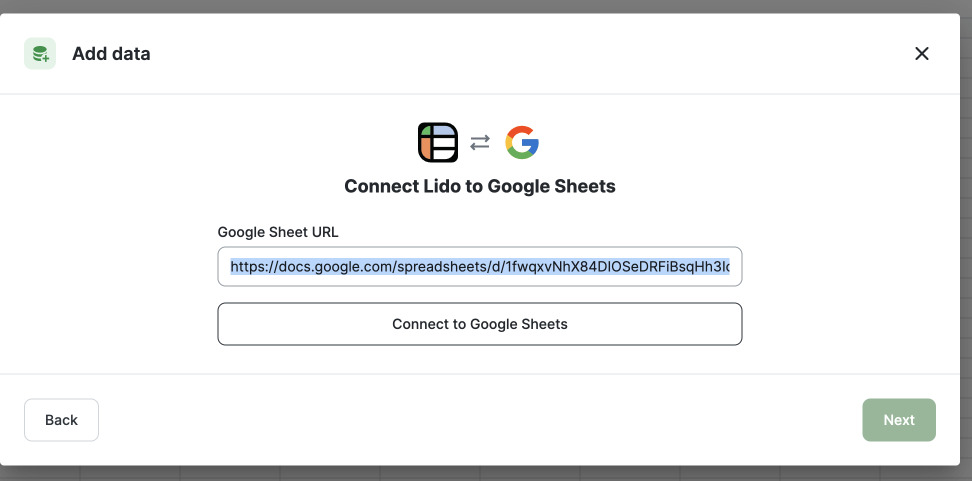
Copy the URL for your Google Sheet. We'll need this to connect your spreadsheet to Lido.
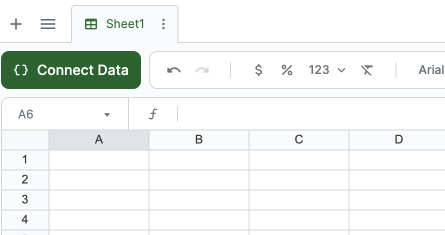
Create a new file, then click on the green Connect Data button.
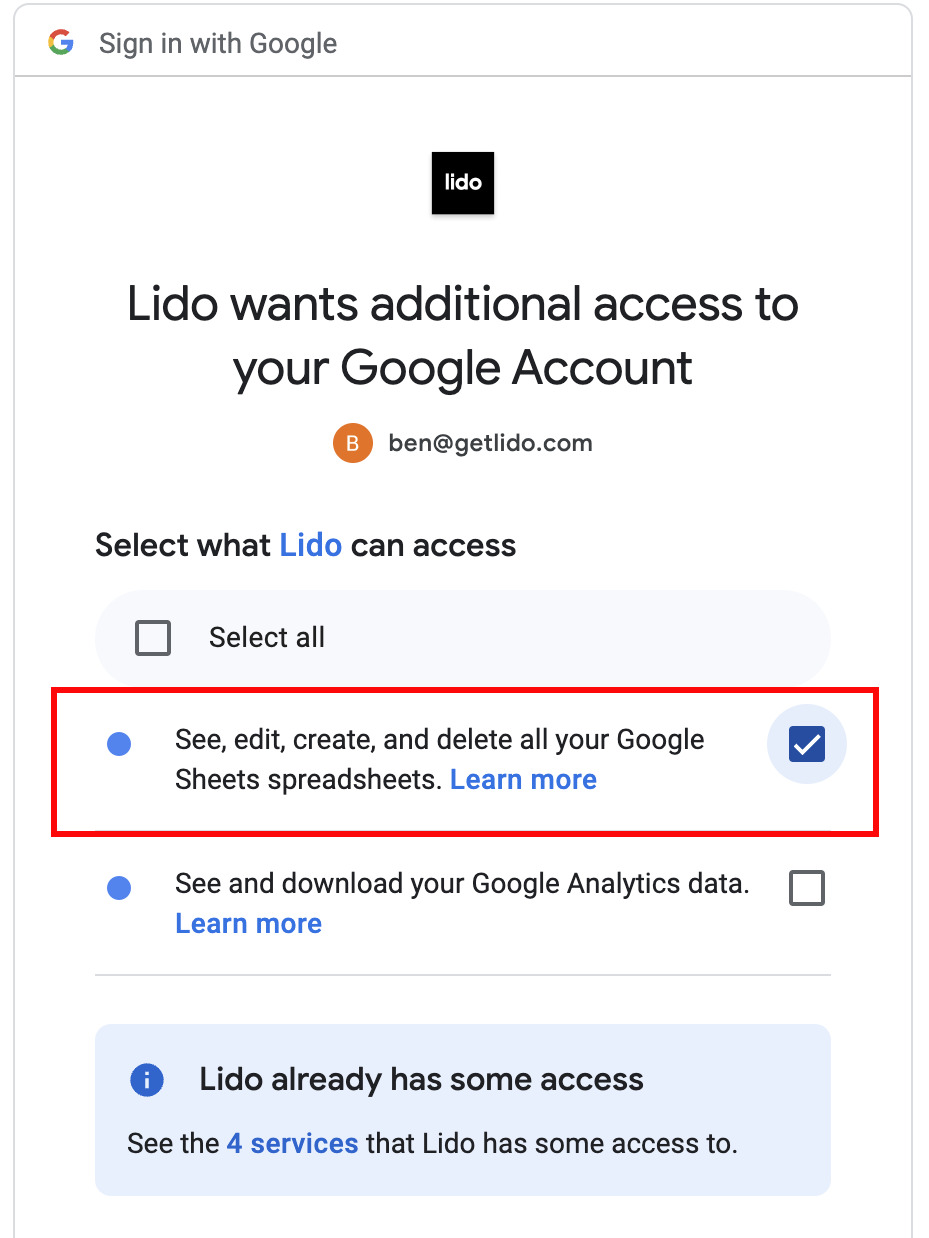
Select Google Sheets, then paste your Google Sheet URL into the text box. You'll be asked to connect to your Google account if it's your first time connecting a Google Sheet to Lido.
You will be asked to login to a Google Account that has access to the Google Sheet the first time you connect. Make sure to check this box to give Lido permission to access your Google Sheets.
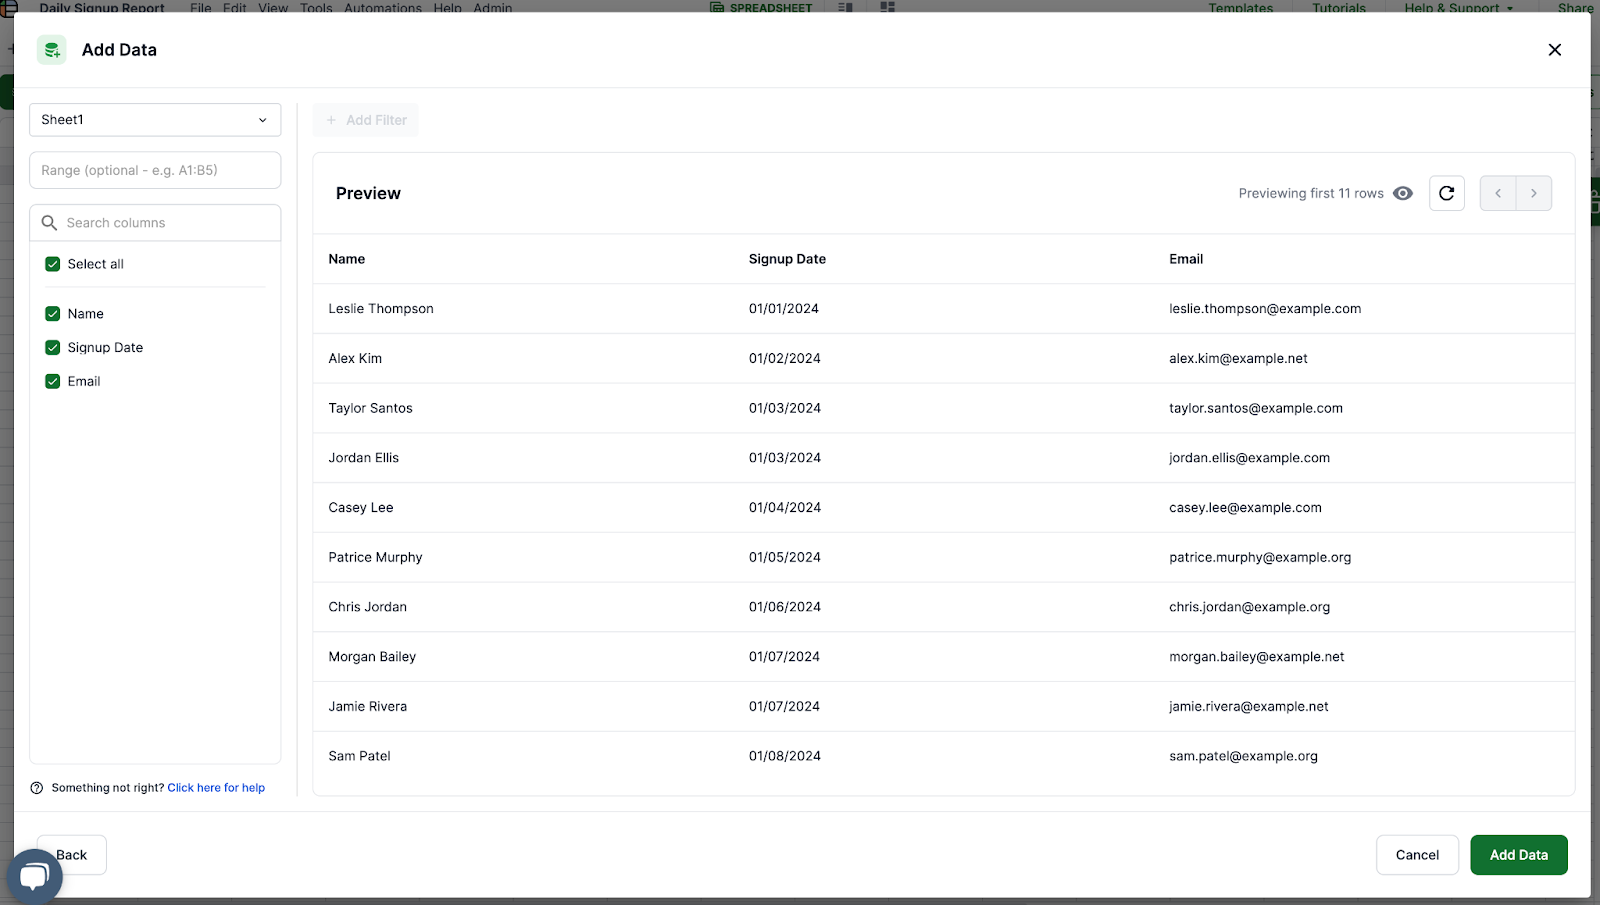
Next, select the columns that you want to add to connect to Lido. Then click Add Data.
Note that if you rename or delete these columns, the connection to Lido will break. If this happens, click on "Edit Data" and you can reselect the correct fields.
3. Use Excel and Google Sheets formulas
Lido has many of the same formulas you know and love in Excel and Google Sheets. We will use the COUNTIF formula to count the number of users that signed up today.
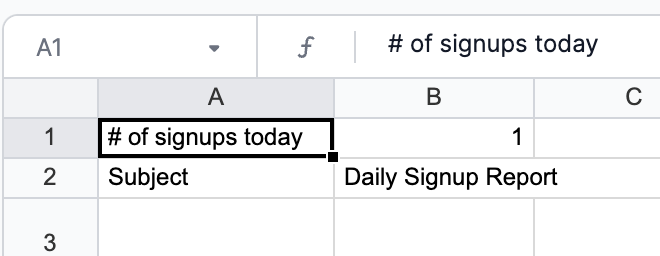
Create a new worksheet to store this calculation. In cell A1, enter the label “# of signups today”. Beside this in cell A2, write the following formula:
```=COUNTIF(Signup Sheet[Signup Date],TODAY())```
If your table or column are named differently, update the formula accordingly, you can see these values in the original table in Lido:
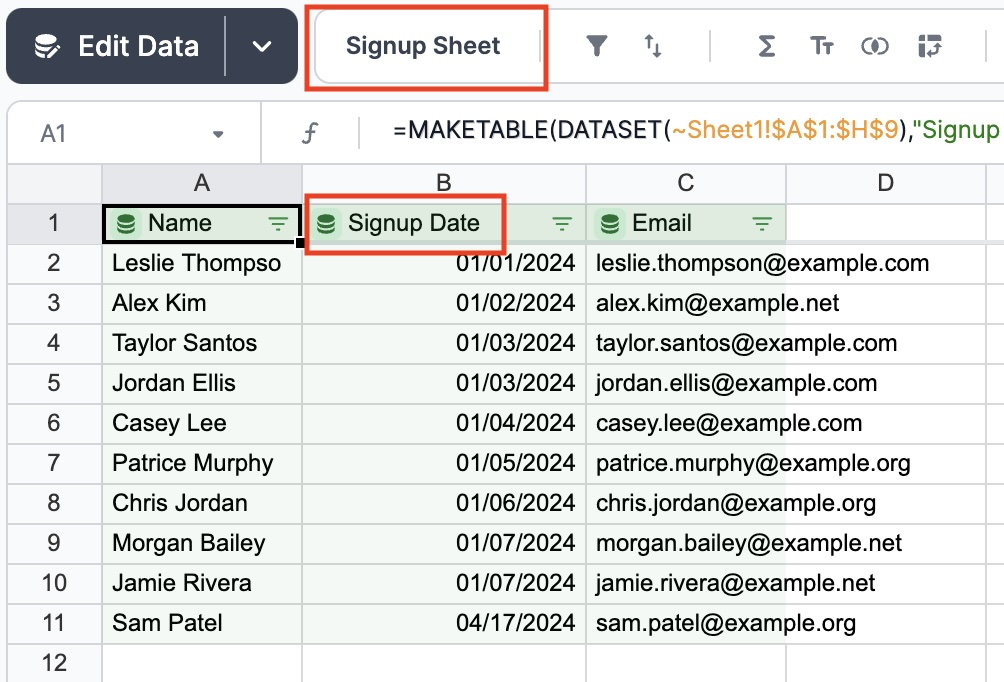
Your sheet should now look like this:
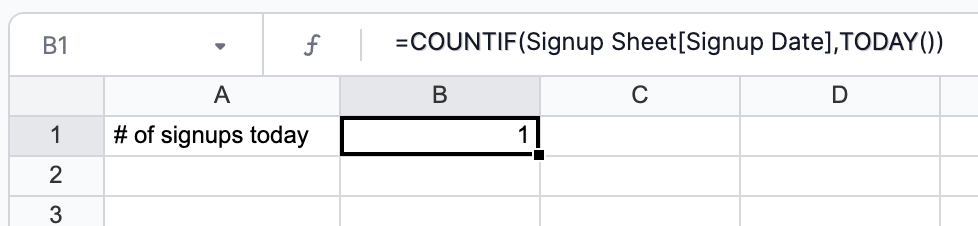
Your number may be different based on your source data.
4. Compose the Reminder Emails in Lido
Now, prepare the email content:
Create Email Subject and Body
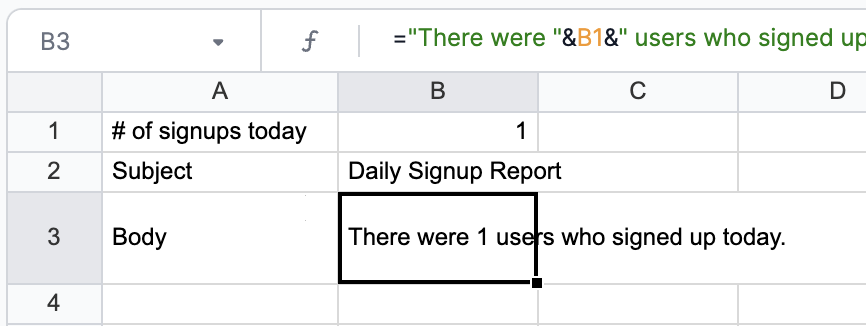
In the same sheet above, write “Subject” on Row 2 along with your desired email subject.
We will then use the & symbol to combine our signup cell with an email body. Here is a sample body you can use for your email report:
`="There were "&B1&" users who signed up today."`
5. Automate Client Email Sending with SENDGMAIL()
Lido's spreadsheet has a special type of formula called Action formulas. These are formulas that can send data externally but need to be triggered to run. Action formulas don't calculate immediately when you type them (as normal spreadsheet formulas do). You need to explicitly run them manually or with an automation. One action formula is SENDGMAIL, which lets you send an email directly from your spreadsheet.
SENDGMAIL works as follows:
=SENDGMAIL(sender, recipient, subject, body, [status_cell], [cc], [bcc], [attachments])
Where:
sender - a credential you create for your@email.com (This should be associated with a Gmail or Google Apps account)
recipient - the email of the client that will receive the reminder
subject - the email subject
body - the email body
Let’s write a SENDGMAIL formula to automatically send ourselves this email:
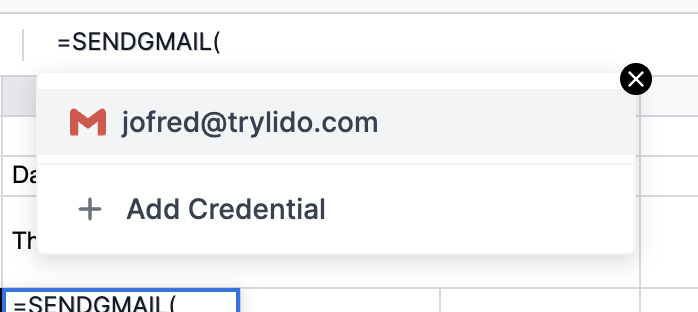
```=SENDGMAIL(<sender credential>,"jofred@trylido.com",B2,B3)```

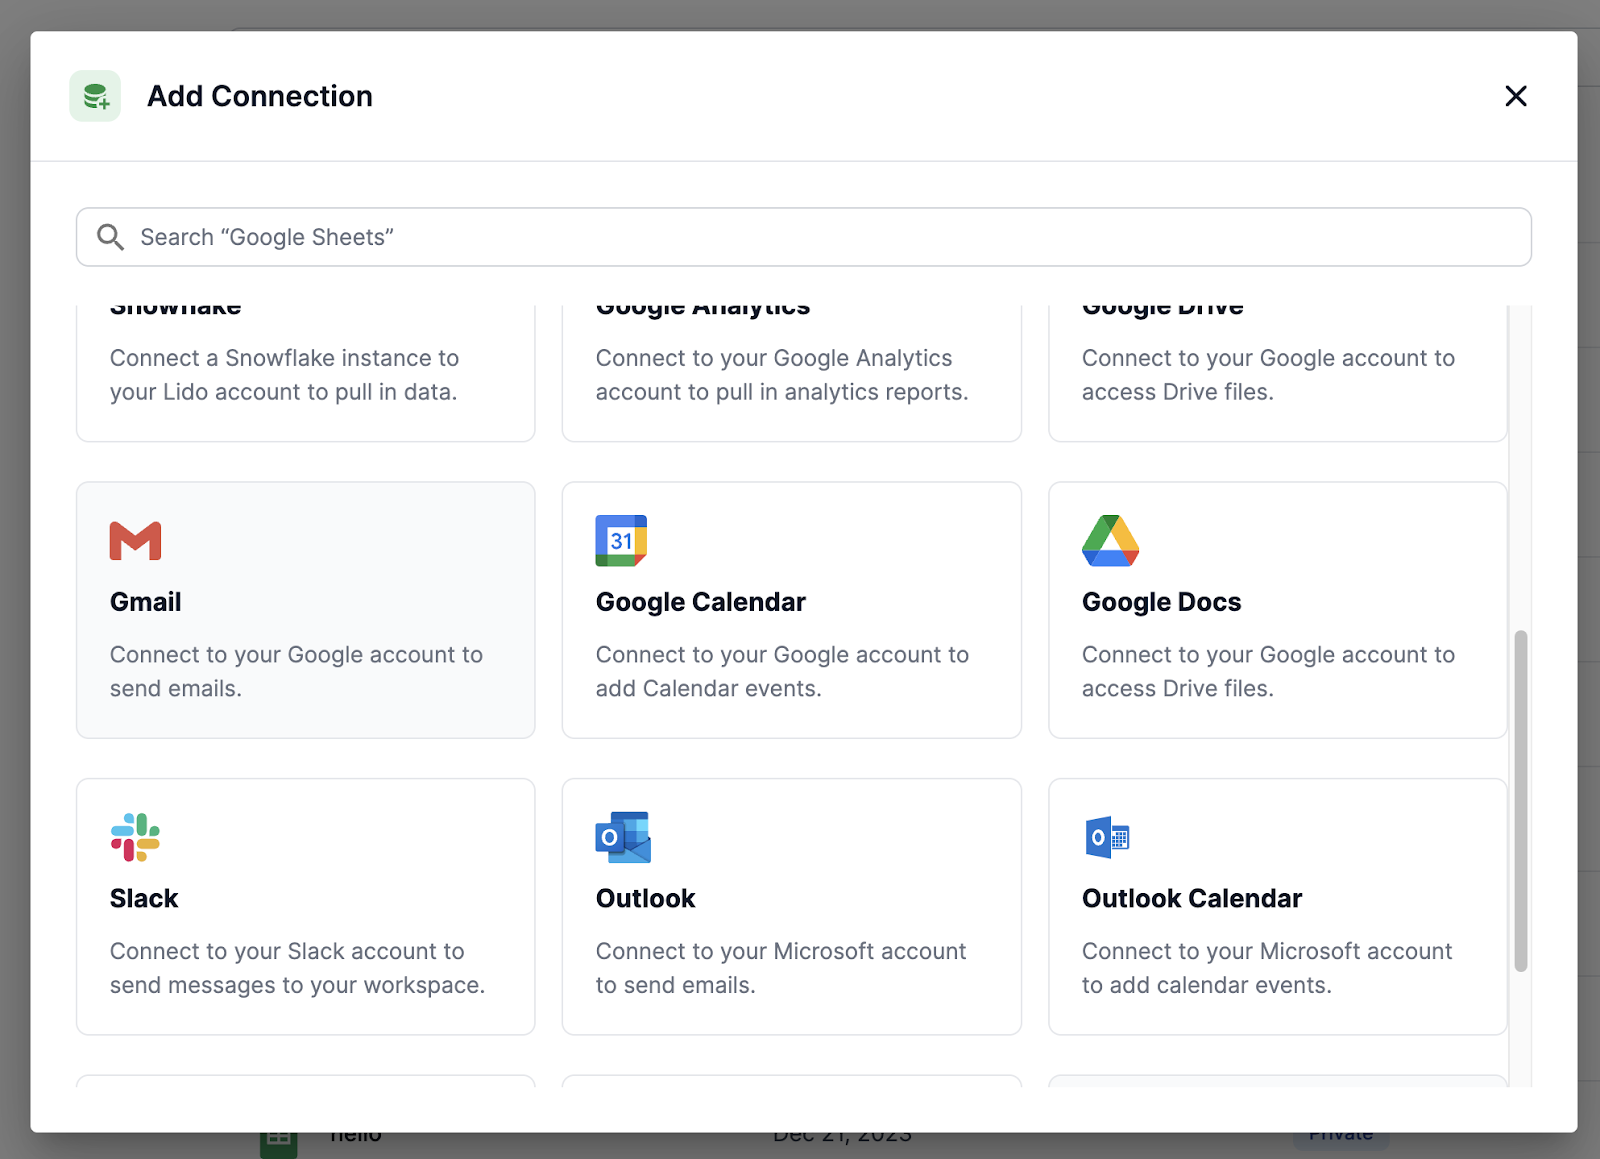
If you do not have a sender credential yet, go to the homepage and navigate to the Connections menu, then press New Connection:

From the list, select Gmail:
Follow the steps to add a Gmail credential to your account. You should now see the email in your connection list.

You should now be able to select this credential when typing out your formula:
6. Schedule the daily report email to be sent
We can now choose to run this cell daily at our specified time. Right-click on the action we just created and click “Add cell automation”:
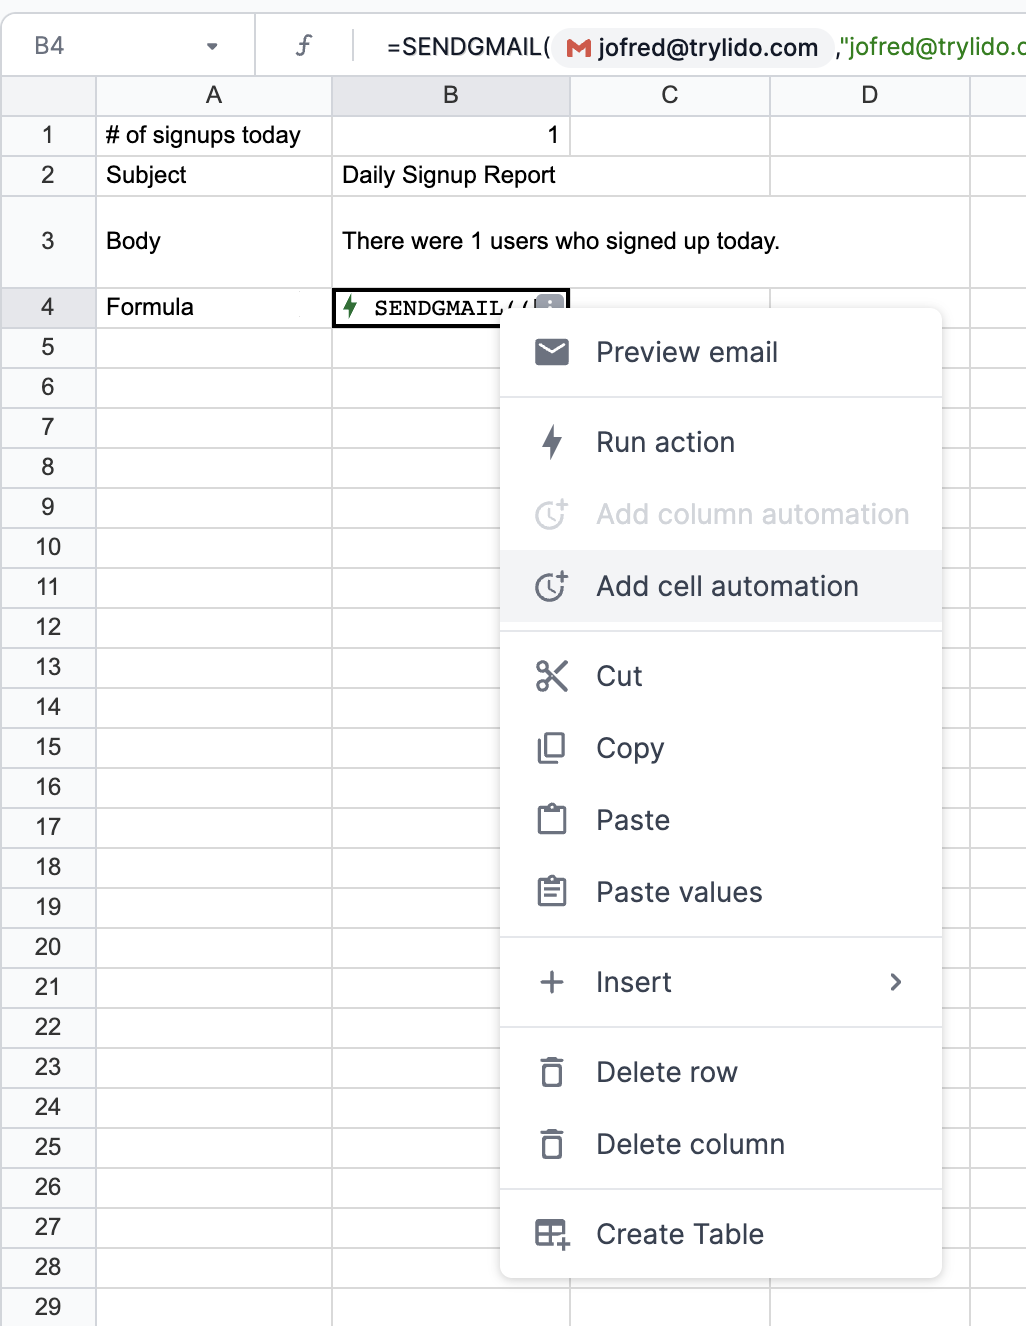
This will open up a menu where we can configure our automation. Name your automation, then choose a schedule that works best for you. Since we want to track signups over the course of the day, let’s choose a date closer to the end of the day, such as 11:30pm:

After you’re done configuring your automation, press “Save”.
Now, every day at 11:30PM (or whatever time you've selected), Lido will pull in the latest records from your Google sheet, automatically check and see if there are any new signup emails that need to be included in the report, and if so, send the email.
Impressed? Click here to get started with Lido!
We hope that you now have a better understanding of how to send a daily email automatically in Gmail. If you enjoyed this article, you might also like our article on how to send automatic email reminders for clients or our article on setting up automated notification emails.