
Send Automatic Email Reminders for Clients (2025 Guide)
In this article, we explain how to send automatic email reminders for clients. Simply follow the steps below!
Setting Up Automated Client Email Reminders through Gmail with Lido
Below we outline the steps on how you can send automatic email reminders for clients:
1. Add Client Data to Lido
Before you can send reminders, you need to input client details into Lido. If you do not have a Lido account yet, sign up for free at: https://www.lido.app/go/signup
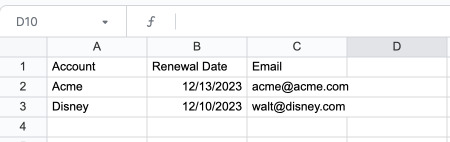
Lido functions like an enhanced spreadsheet that helps automate tasks by linking data directly to emails. To begin, enter the details such as client names, the dates reminders are due, and the specific messages you want to send. If this data is already organized in a Google Sheet, move to step 2. Otherwise, create a table with each row representing a unique reminder for a client. This table should have a column containing the email addresses for each client.
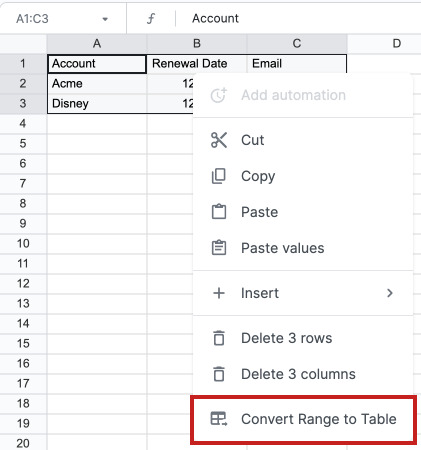
Once your data is formatted, right-click the selection and choose "Convert Table from Range". Save your named table and proceed to the next step.
2. (Optional) Connect Google Sheet to Lido
Skip this step if you added a table already in step 1. Otherwise, if you already have the data that you want to use to send automated email reminders to in a Google Sheet, then you can connect the Google Sheet directly to Lido.
Make sure your Google Sheet is formatted like our sample sheet here. The data should be in a contiguous table, with no empty rows or columns. Column headers (Name, Email Address, etc.) should be in the first row and contain no special characters or line breaks.

Copy the URL for your Google Sheet. We'll need this to connect your spreadsheet to Lido.
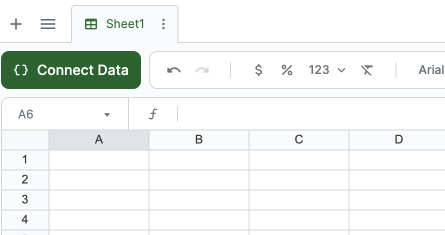
Create a new file, then click on the green Connect Data button.
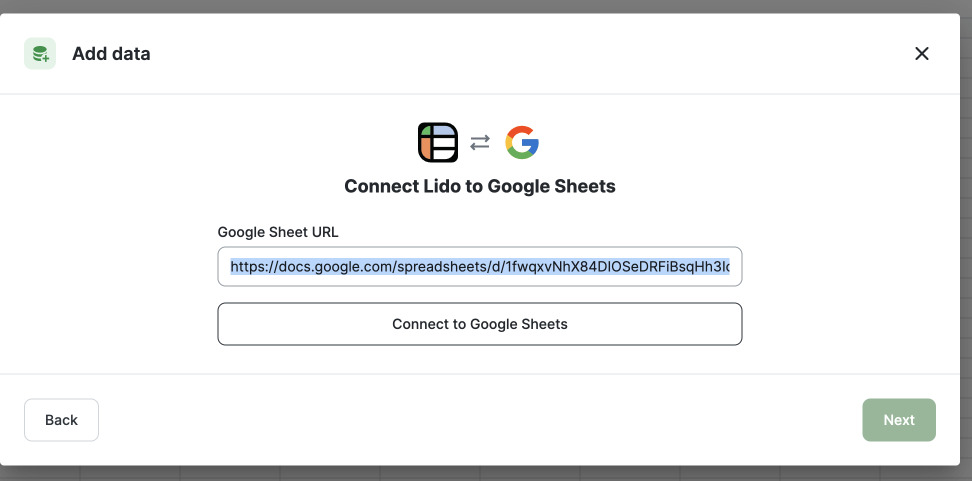
Select Google Sheets, then paste your Google Sheet URL into the text box. You'll be asked to connect to your Google account if it's your first time connecting a Google Sheet to Lido.
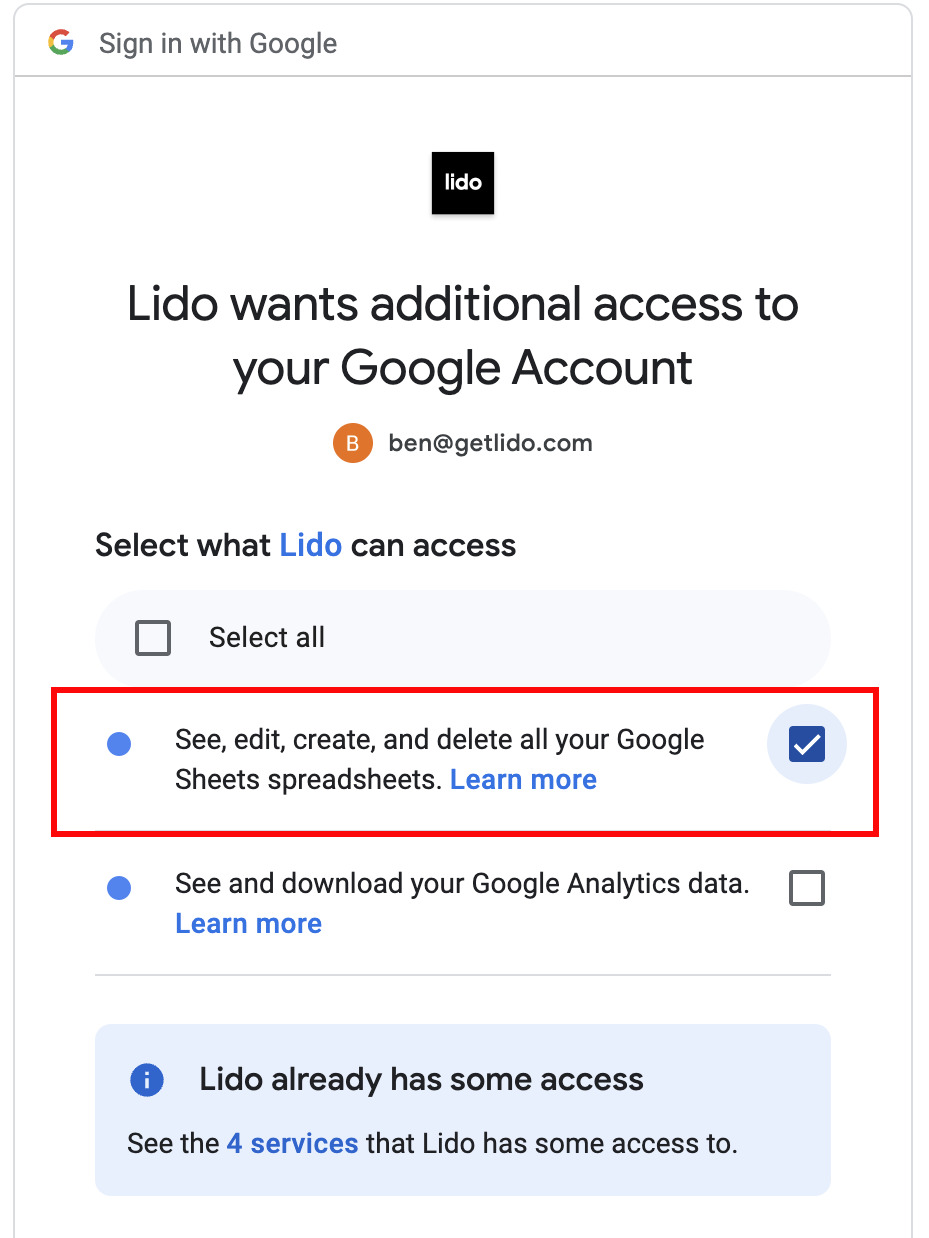
You will be asked to login to a Google Account that has access to the Google Sheet the first time you connect. Make sure to check this box to give Lido permission to access your Google Sheets.
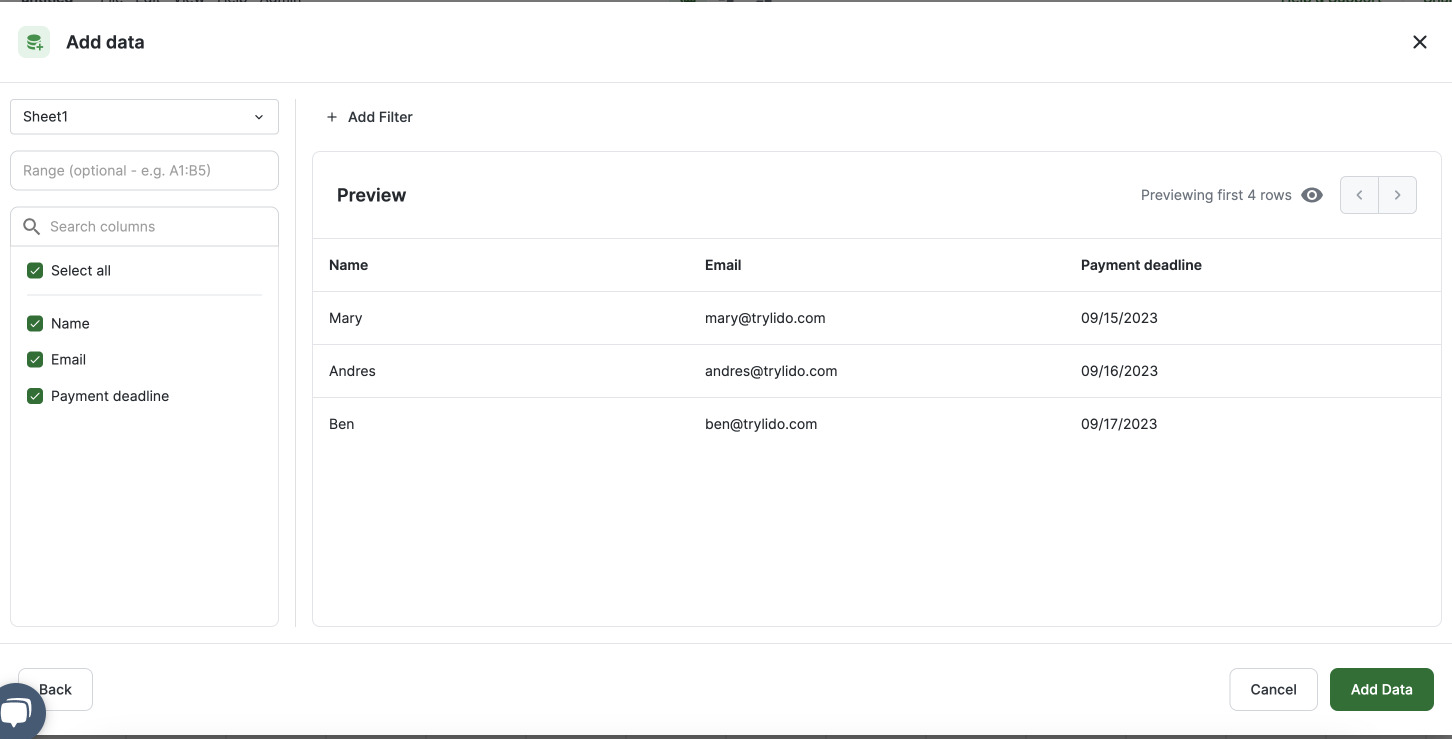
Next, select the columns that you want to add to connect to Lido. Then click Add Data.
Note that if you rename or delete these columns, the connection to Lido will break. If this happens, click on "Edit Data" and you can reselect the correct fields.
3. Set Up Reminder Timing
With your data ready in Lido, decide when the reminders should be sent. Usually, reminder emails are sent ahead of a client’s deadline. For example, to send a reminder two days before a due date, use this formula:
`reminder_date = deadline_date - 2`
Where deadline_date is the cell containing the deadline date. If the deadline is stored in column C, then the deadline of the first listed entry will be in C2. The formula becomes
`=C2-2`
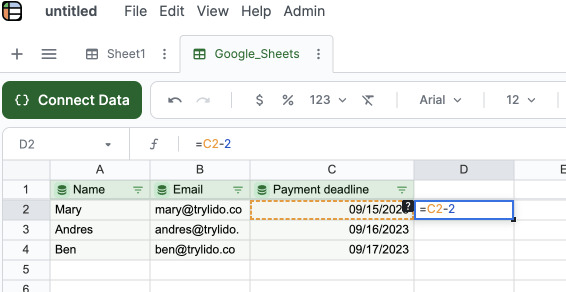
Hit enter to create a computed column. This is a special column type in Lido that will automatically apply the same formula to every row in the column. This is particularly useful if you add more records to your Google Sheet or to the bottom of your table, since the formula will be applied to the new rows automatically.
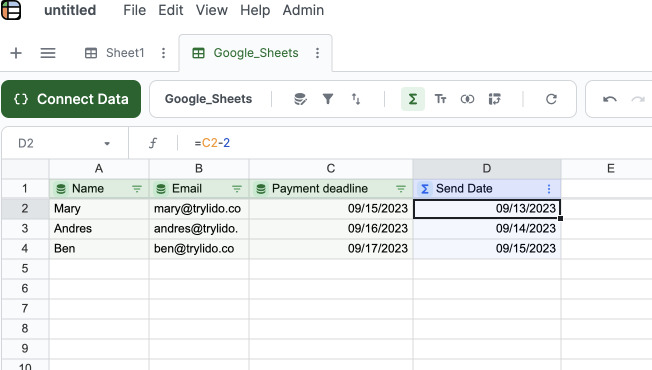
We can name this column Send Date
4. Compose the Reminder Emails in Lido
Now, prepare the email content:
Create email templates
First we will create templates using our table column names as variables by referring to them with [@Column] syntax.
Set up templates for email subject and body in a new worksheet like this:
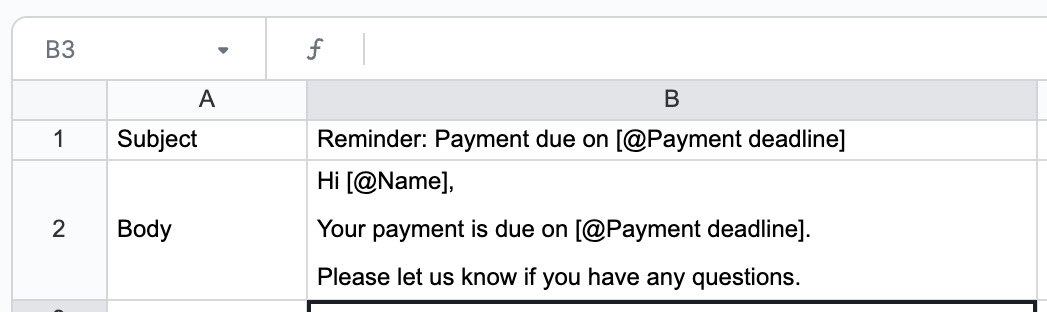
Create Email Subject and Body referencing the templates
Now we need to combine these templates with our table data in the other tab to make the email content dynamic. We'll do that by creating two new computed columns for both Subject and Body. We will use a formula called STRINGTEMPLATE() inside of a computed column to do this.
First, make a new computed column and name it Subject.
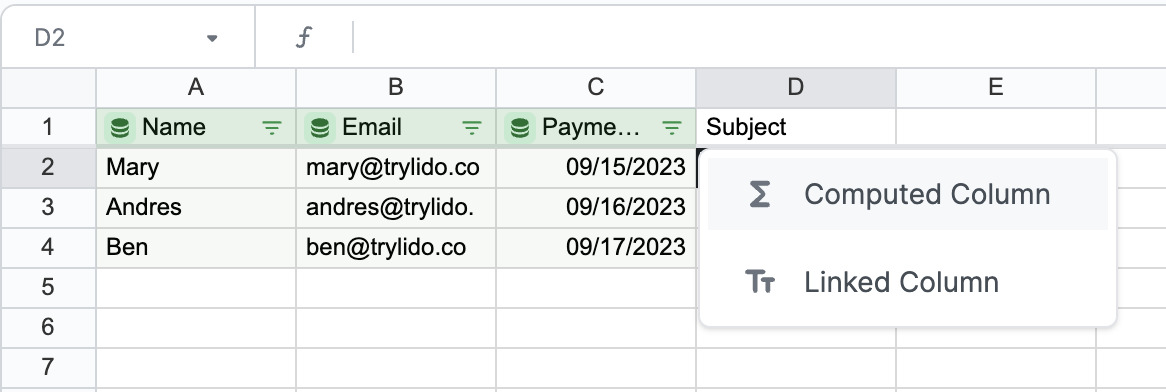
Add this formula to row 2 in the Subject column:
```=STRINGTEMPLATE(Sheet1!$B$1)```
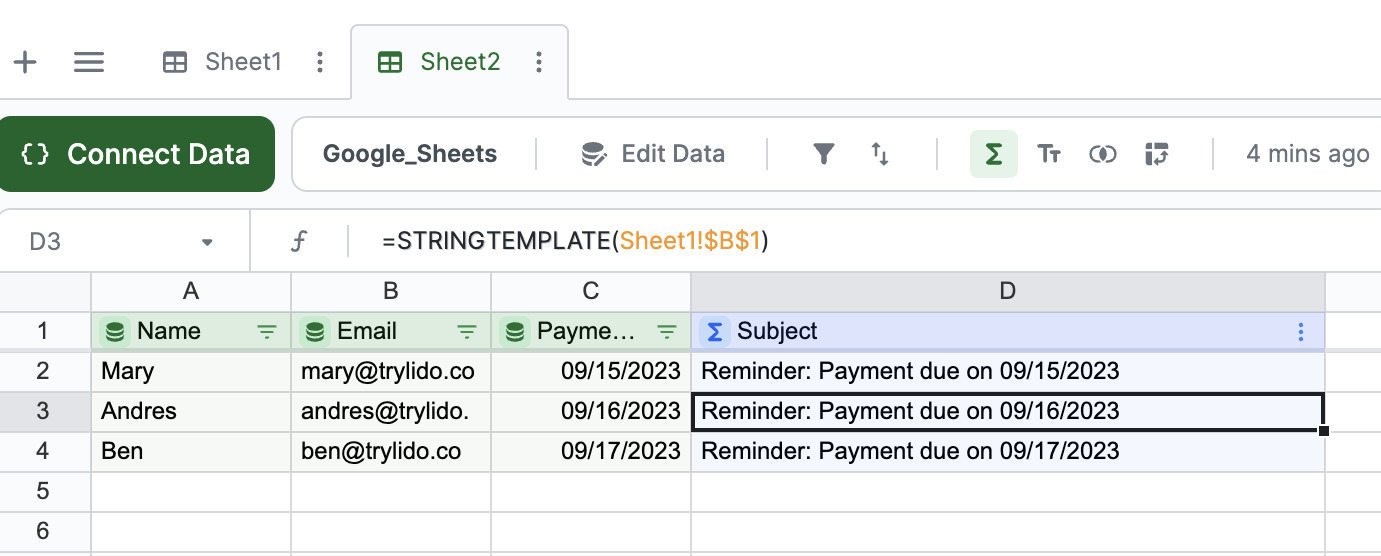
In our example, Sheet1!$B$1 is the location of our subject email template. Make sure you replace this with your own cell location if it is different, otherwise the formula will not work. Also, remember to anchor the cell reference with $, as all rows will use the same template cell.
You should now have a subject column that looks like this. Notice how the payment deadline is different for each row based on the values in column C.
Now do the same thing for the email body. Make another computed column. Then apply the formula below. Remember to change the cell references to match your sheet.
```=STRINGTEMPLATE(Sheet1!$B$2)```
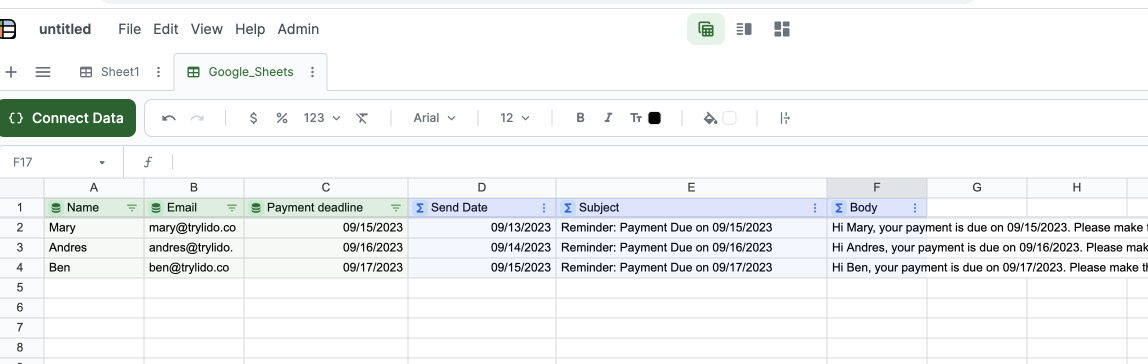
You now will have something that looks like this:
5. Automate Client Email Sending with SENDGMAIL()
Lido's spreadsheet has a special type of formula called Action formulas. These are formulas that can send data externally but need to be triggered to run. Action formulas don't calculate immediately when you type them (as normal spreadsheet formulas do). You need to explicitly run them manually or with an automation. One action formula is SENDGMAIL, which lets you send an email directly from your spreadsheet.
SENDGMAIL works as follows:
=SENDGMAIL(sender, recipient, subject, body, [status_cell], [cc], [bcc], [attachments])
Where:
sender - a credential you create for your@email.com (This should be associated with a Gmail or Google Apps account)
recipient - the email of the client that will receive the reminder
subject - the email subject
body - the email body
Our core SENDGMAIL formula looks like this:
=SENDGMAIL(<sender-credential>, B2, E2, F2)
Add logic for when you want the reminder email to be sent
If we want to have SENDGMAIL run only when today's date is the reminder send date, then we want to add an IF statement:
=IF(TODAY() = <reminder send date>, SENDGMAIL(sender, recipient, subject, body))
The formula works as follows:
If today's date is equal to the send date, then display the SENDGMAIL formula, otherwise display FALSE.
Create a new Computed Column
Let's create a new computed column, and enter our formula below in row 2 (remember to adjust the formula for your data). We can double click on the header cell, and rename the column to Send Reminder.
=IF(TODAY() = D2, SENDGMAIL(<sender-credential>, B2, E2, F2))
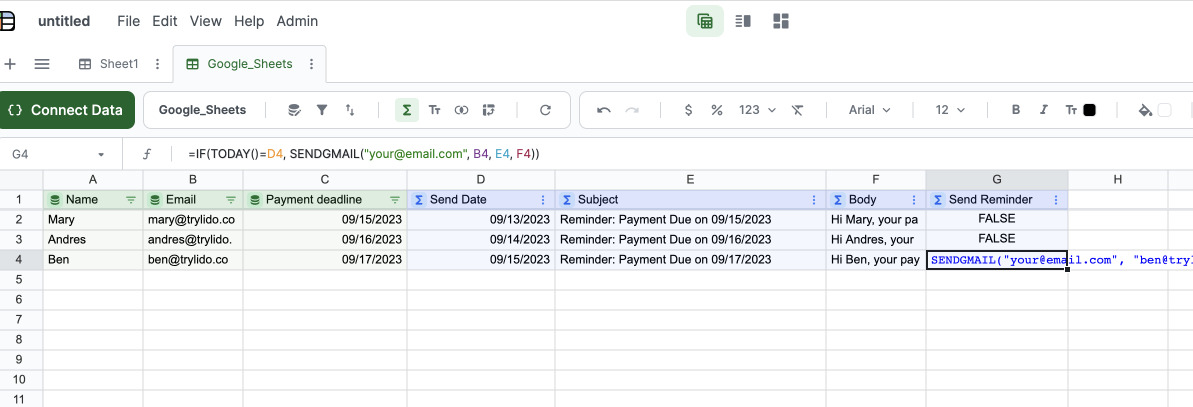
As you can see, the SENDGMAIL formula is only visible for dates when Send Date = Today. For all other days it displays FALSE.
Send a test email
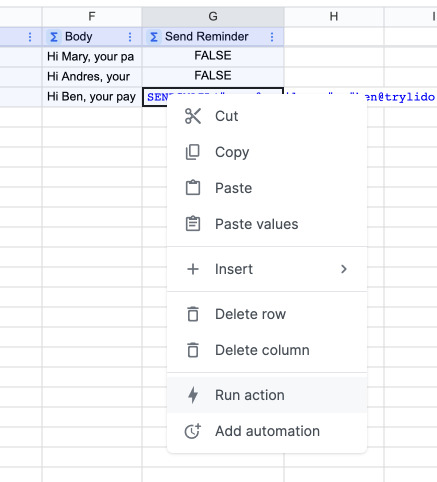
Right click on the SENDGMAIL formula and click "Run Action'' to send the email. You will be asked to authenticate into your Gmail account the first time that you send an email from Lido.
6. Schedule and Automate Client Reminder Emails
Finally, automate the sending process:
Now, we can automate the running of the Send Reminder column. For rows where SENDGMAIL displays in the column, Lido can automatically run them once per day, even if the file is closed.
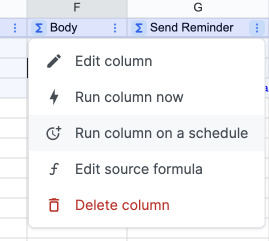
Click on your Send Reminder column menu and select Run column on a schedule.
Select what time of day you want your messages to send, then click save.
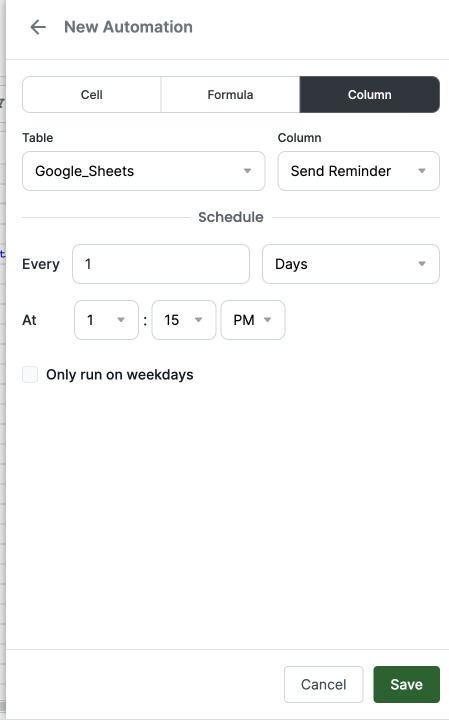
Now, every day at 1:15PM (or whatever time you've selected), Lido will pull in the latest records from your Googlle sheet, automatically check and see if there are any reminder emails that need to be sent where TODAY = <reminder send date>, and if so, run the each SENDGMAIL formula and send the emails.
Impressed? Click here to get started with Lido!
FAQs
Here are some frequently asked questions:
How to Automate Email Reminders a Week Before the Date?
Easy. In the Step 3 above, just change the number in the formula. For the example that we use, we have the following formula:
=C2-2
This will send the reminder two days before the deadline. To send the reminder a week before the deadline, just change the number to 7 (7 days):
=C2-7
If instead you want to send the reminder 3 days before the deadline, just change it to 3:
=C2-3
And so on.
How do you Check if your Formula Works First?
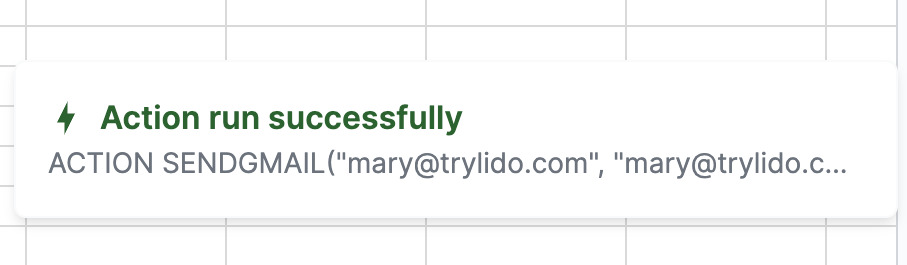
You can check if the formula works first before setting the automation settings. First, change the sender_email and recipient_email to the one you can open. Afterwards, click the cell containing the formula for sending reminder emails. Then, click right click on the SENDGMAIL formula and select Run action.

Lido will run the formula. If the formula has no errors, the message Action run successfully will appear on the lower-right corner of Lido.
How to Send Automated Reminder Emails Multiple Times for the Same Client?
You can also send reminders a few times at different times to the same client. You just need to repeat the Steps 3 to 6, adding a set of columns for each instance.
We hope that you now have a better understanding of how to send automatic email reminders for clients. If you enjoyed this article, you might also like our article on how to send automatic email reminders.