How to Send Automatic Email Reminders: Easiest Way in 2025
In this article, you will learn how to set up automatic email reminders in just a few clicks so you never miss sending an email reminder. Simply follow the steps below.
Step 1: Add Your Reminders in Google Sheets
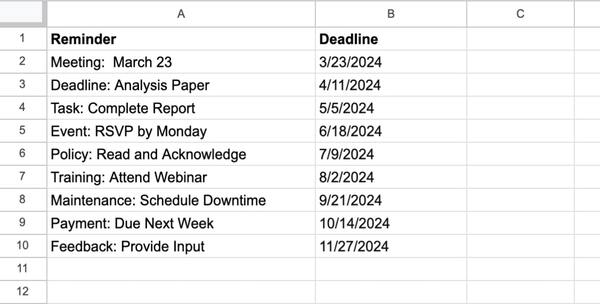
Start by adding the reminder message, the deadline date and where you want to send the reminder (this can be your own email address if you want to remind yourself) to a Google Sheet.
For our example, we will be sending reminders to ourselves for different dates.
Step 2: Create a Lido Account
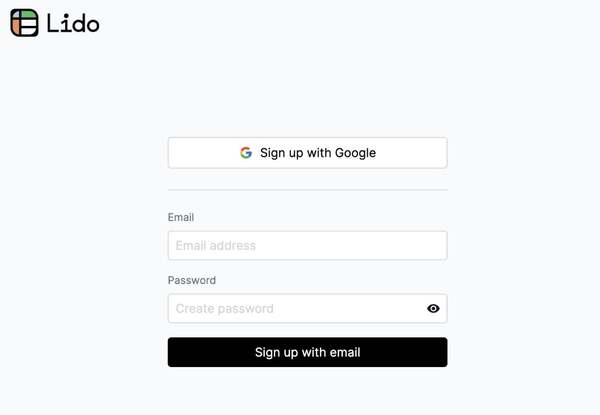
Create a free account for Lido, a new spreadsheet tool that simplifies email automation and is fully compatible with Google Sheets, by visiting https://www.lido.app/go/signup.
Step 3: Connect your Google Sheet to Lido
In the Lido App, Click the green "Connect Data" button and select "Google Sheets" from the options.
Copy and paste the URL of your Google Sheets document, then click on "Connect to Google Sheets
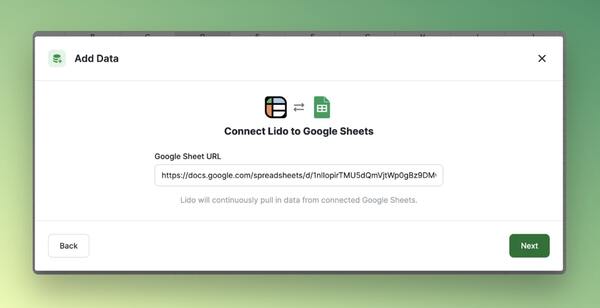
Follow the authentication steps in Google and then add the data by selecting the columns from your Google Sheet.
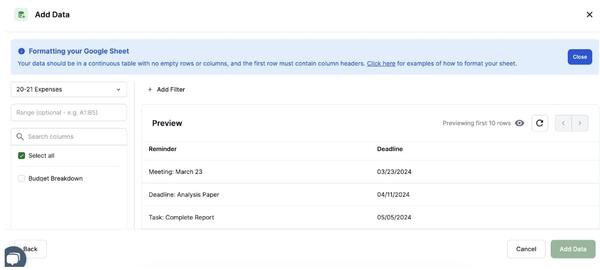
From the pop-up, select all your columns and press “Add Data” on the lower right side. You should now have your data imported.

Step 4: Create a Column for When to Send the Reminder Emails
Since we want these to be reminders, we need to send the emails earlier than the deadline. We can either set dates when we want to be reminded or send reminders a specified number of days before the deadline. In Lido, we’ll put them in Column C, which we will name as Reminder Date.
We can use a formula for a fixed number of days before the deadline, using
reminder_date=deadline_date - number_of_days_before
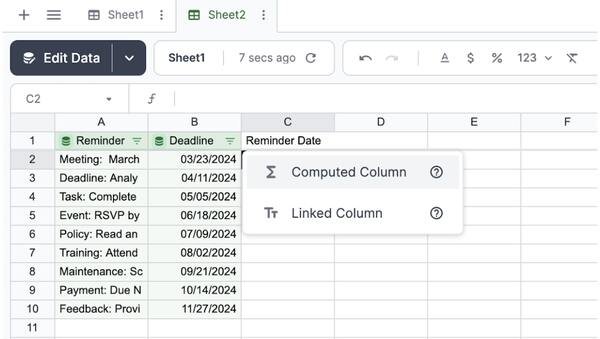
For our example, let us send a reminder two days before the deadline. Go to Column C and create a header called “Reminder Date”. Select “Computed Column” from the options after typing the header text.
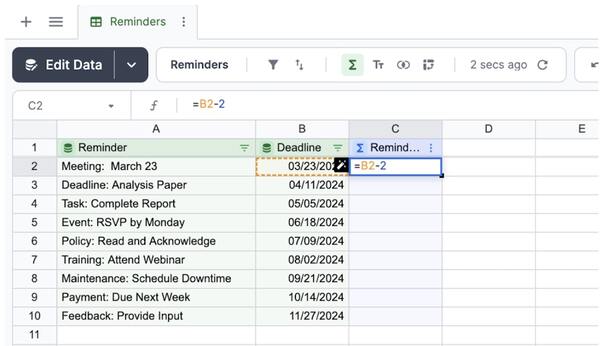
Use the formula =B2-2 in Cell C2. This will automatically fill in the other reminder dates.
Step 5: Create an Email Template for Your Reminder
Click the + button in the upper left corner of our workspace to create a new worksheet. Here we will create a template for the Email Subject and Email Body. Double click on the worksheet tab to rename it. We’ll name this tab “Email”.
You can write whatever you’d like your email to look like but refer to variable inputs in the form of [@Column]. These can be used to change values dynamically later using the rows from your dataset.
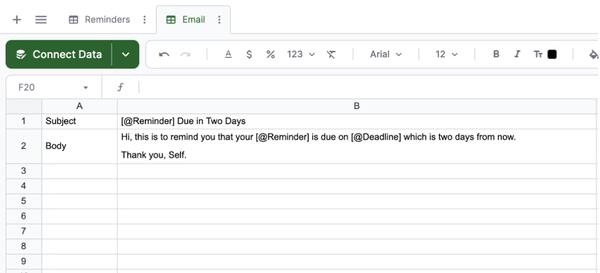
In the example below we want our email subject to be "Meeting: March 23 Due in Two Days".
We will write: [@Reminder] Due in Two Days
For the email body we will write: Hi, this is to remind you that you [@Reminder] is due on [@Deadline] which is due two days from now. Thank you, Self.
Step 6: Dynamically Create the Email Subject and Body
In our Reminders sheet, we will create computed columns to use the email templates. Use the formula =STRINGTEMPLATE("reference_cell”) where the reference_cell is the cell with the template in our other Email sheet.
Go to Cell C1, make a computed column and input
```=STRINGTEMPLATE(Email!$B$1)```
Do the same for Cell D1 but use Cell $B$2 from your template worksheet.
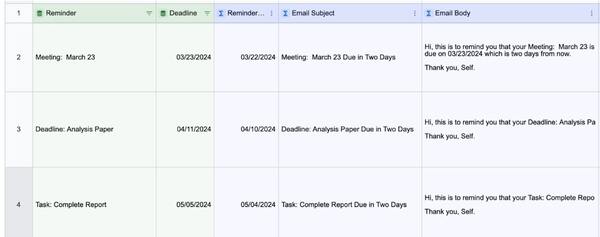
You'll see the full columns automatically fill up with your different subjects and email body templates.
Remember to anchor your cell references with $ signs since our templates are on static cells. Email! in our formula is the name of the sheet we created earlier. If you named your sheet something else, make sure your formula reflects this.
Step 7: Make a =SENDGMAIL() Formula Column
To send our reminder email from Lido, we will use the following formula:
```=SENDGMAIL(sender, recipient, subject, body)```
Sender: This is the Email address you will send your emails from. This will be email@gmail.com. Make sure to use your own email address
Recipient: This is the email address we will be sending the email reminder to. In our example this will be our email address again of example@gmail.com. You can also include a cell reference if you want to use a column of emails
Subject: This will be the email subject the user sees in their inbox, in our example we will set this as D2 which is the first sell in our subject computed column.
Body: This is the email body the recipient will see. In our example we will add E2 which is the first row of our email body computed column.
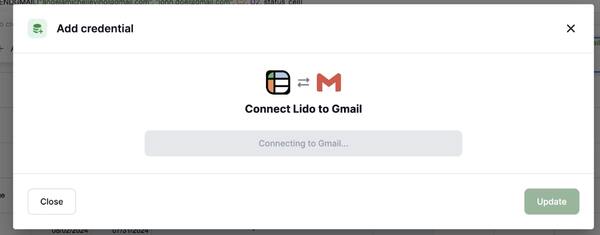
Note: While typing our sender email, you will be prompted to add your credentials. Simply Connect Lido to your Gmail to grant access.
If we look at the parameters of the formula above, we will see that we haven’t assigned the reminder date provided. We do this by using the modified IF formula:
The final formula in our example for cell F2 will be:
```=IF(TODAY() = C2, SENDGMAIL("john.doe@gmail.com", "john.doe@gmail.com", D2, E2))```

You will see that the column will display “FALSE” when the Reminder date is not yet the day today.
Step 8: Test Your Send Gmail Column.
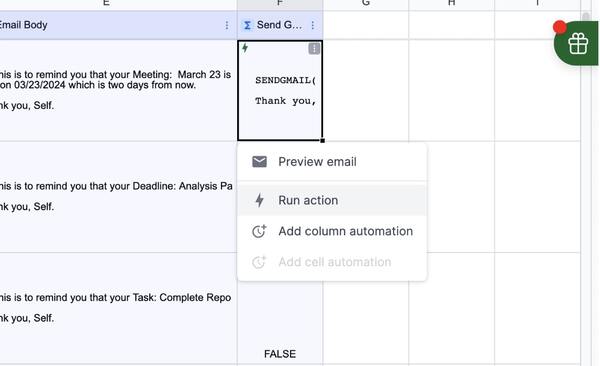
Test your email by making a deadline equivalent to today’s date. Right click the Send Gmail cell on this row and click “Run Action”. You might be requested to authenticate Lido but the email should be sent after running the action and giving permissions.
If you do not receive an email to the specified inbox, double check that you followed the previous steps correctly or contact Lido support for more help.
Make sure this is an inbox you control and not a client email address or they will receive the test email!
Step 9: Create an Automation to Send the Email Reminder on a Schedule
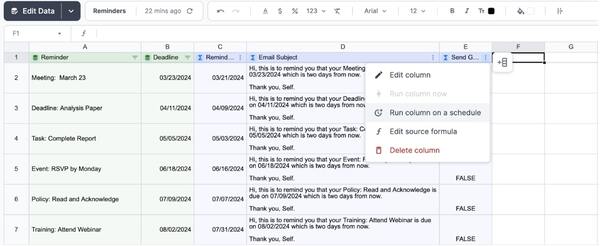
Right click on the header of your Send Gmail Column and select “Run Column on A Schedule”
In the pop-up, input a time where you want your emails to be sent. Let’s choose 10:00 am and press save.
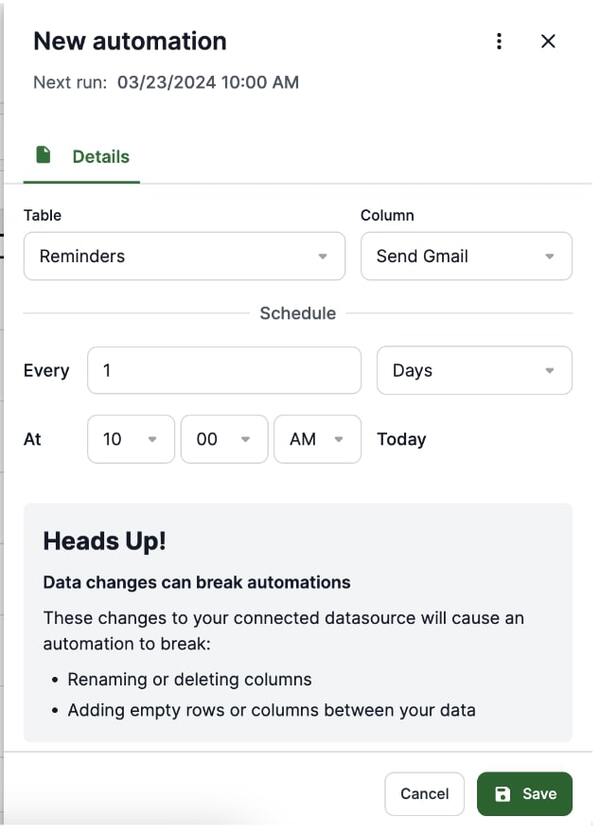
Our automation will now run every day at 10:00 am and will send reminders when the date falls on the reminder day.
You can update your Google Sheet for new dates and new reminders and Lido will automatically update your program to send reminders for them!
We hope you now have a better understanding of how to send automatic email reminders using Lido.
If you want to learn how to send email to multiple recipients or how to set a reminder on iphone calendar, then check out our other articles.

